CoinPayments Integration Guide Steps
Overview of Step 2: Integration
Now that your CoinPayments account is set up and customized to your preferences, it’s time to integrate it into your business operations. Depending on the level of automation you need and the type of platform you use, CoinPayments offers multiple integration options tailored to your business:
- Invoicing
- Payment Buttons
- Pre-Built eCommerce Plugins
- Custom APIs
Invoicing
For businesses offering on-demand services, the CoinPayments invoicing tool provides an easy way to receive payments without requiring any coding knowledge. This fully automated feature ensures a smooth experience for both you and your clients.
How to Get Started
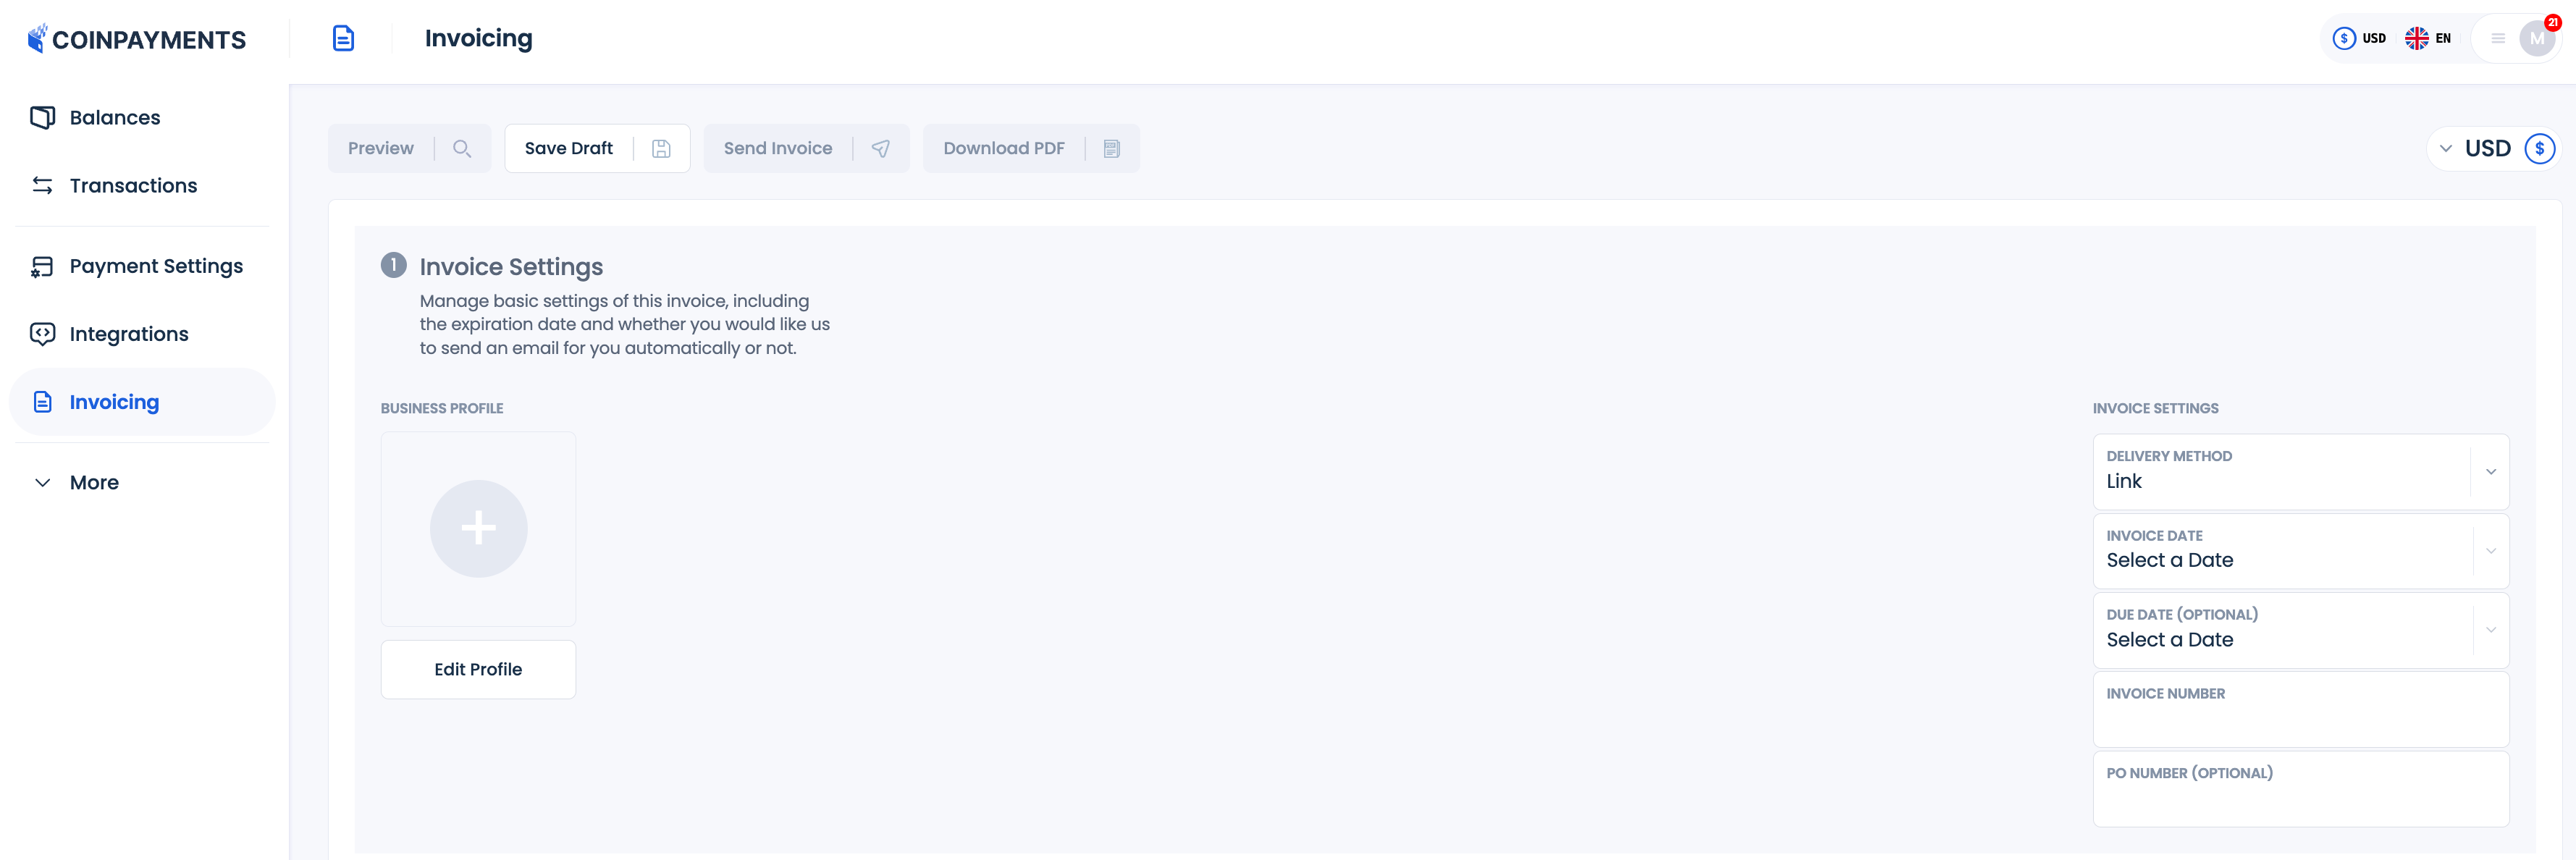
- Access the Invoicing Tool:
- Navigate to the Invoicing tab in your CoinPayments dashboard.
- In the Invoice Settings section, click Edit Profile to add your business details. These details will appear on every invoice, so make sure they are accurate and complete.
- Choose how you’d like to deliver the invoice. You can either send it automatically to your client’s email or manually send them a link if you prefer more control.
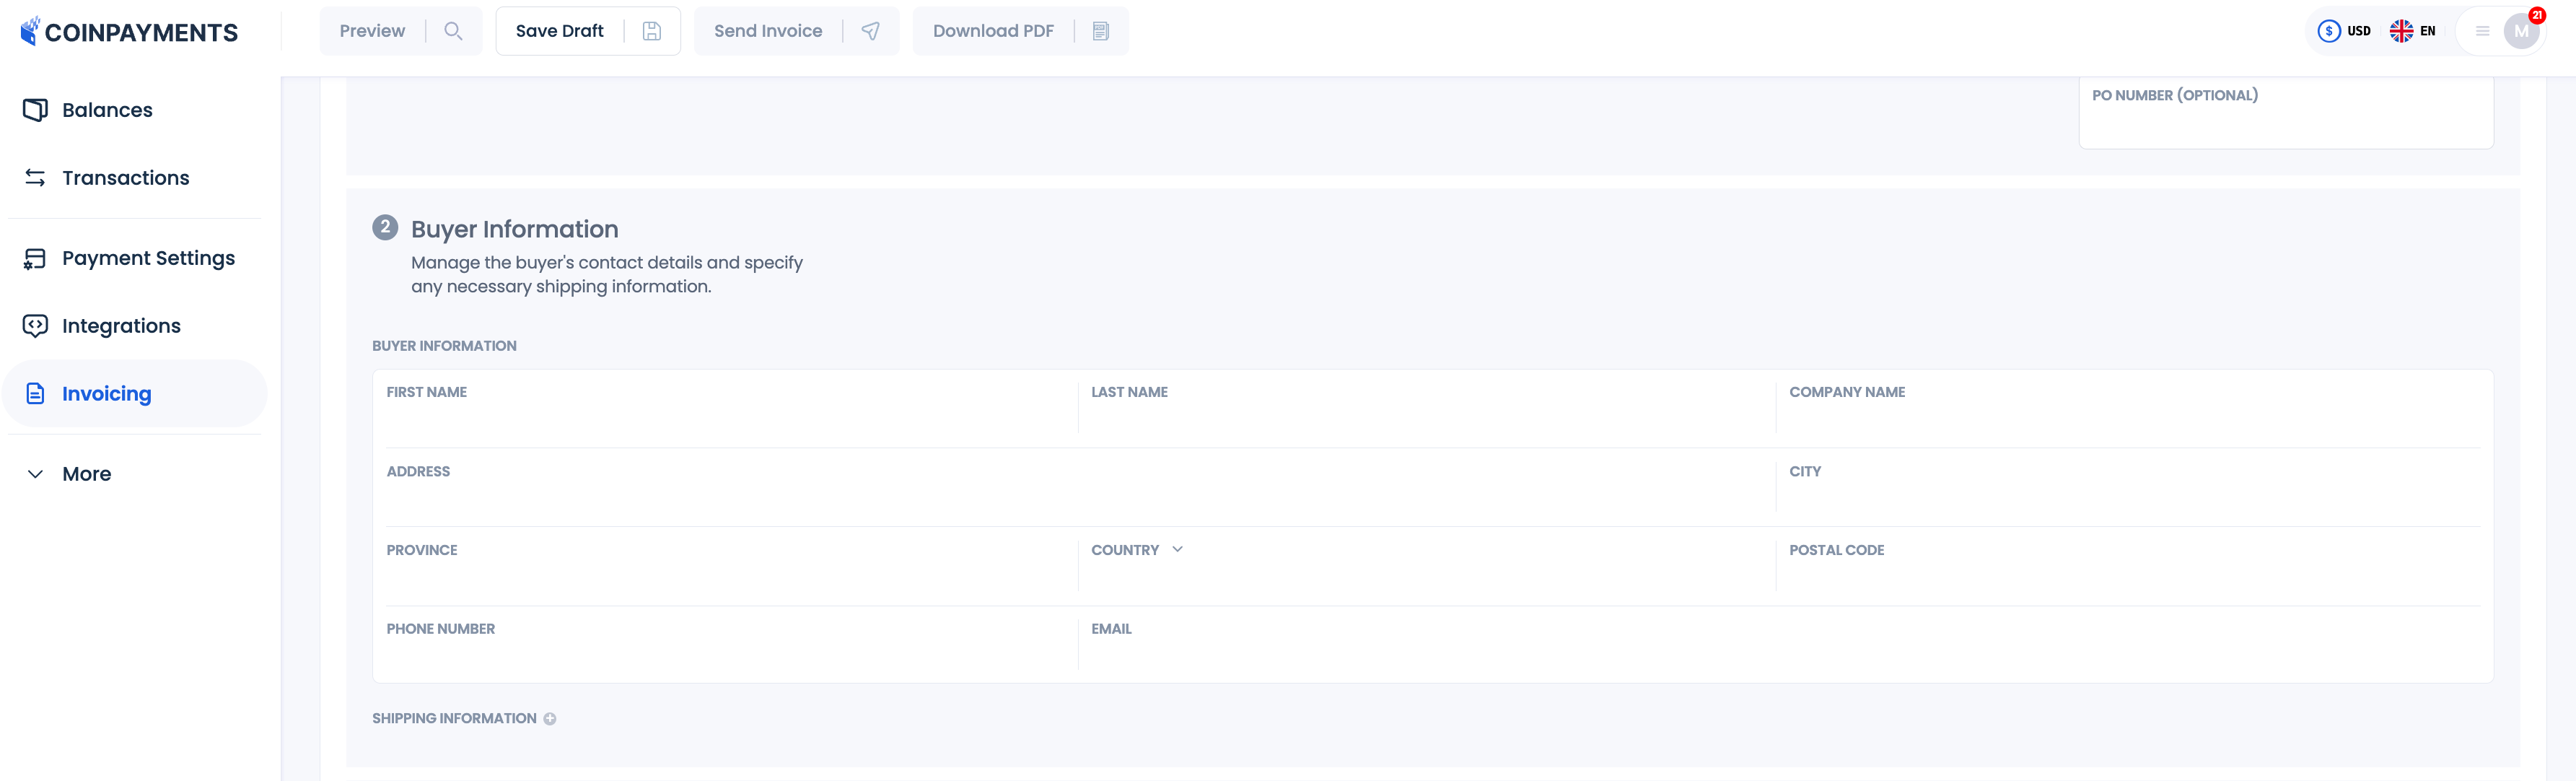
- Add Buyer Information:
- Enter the buyer’s business name, contact name, and email address in the Buyer Information section.
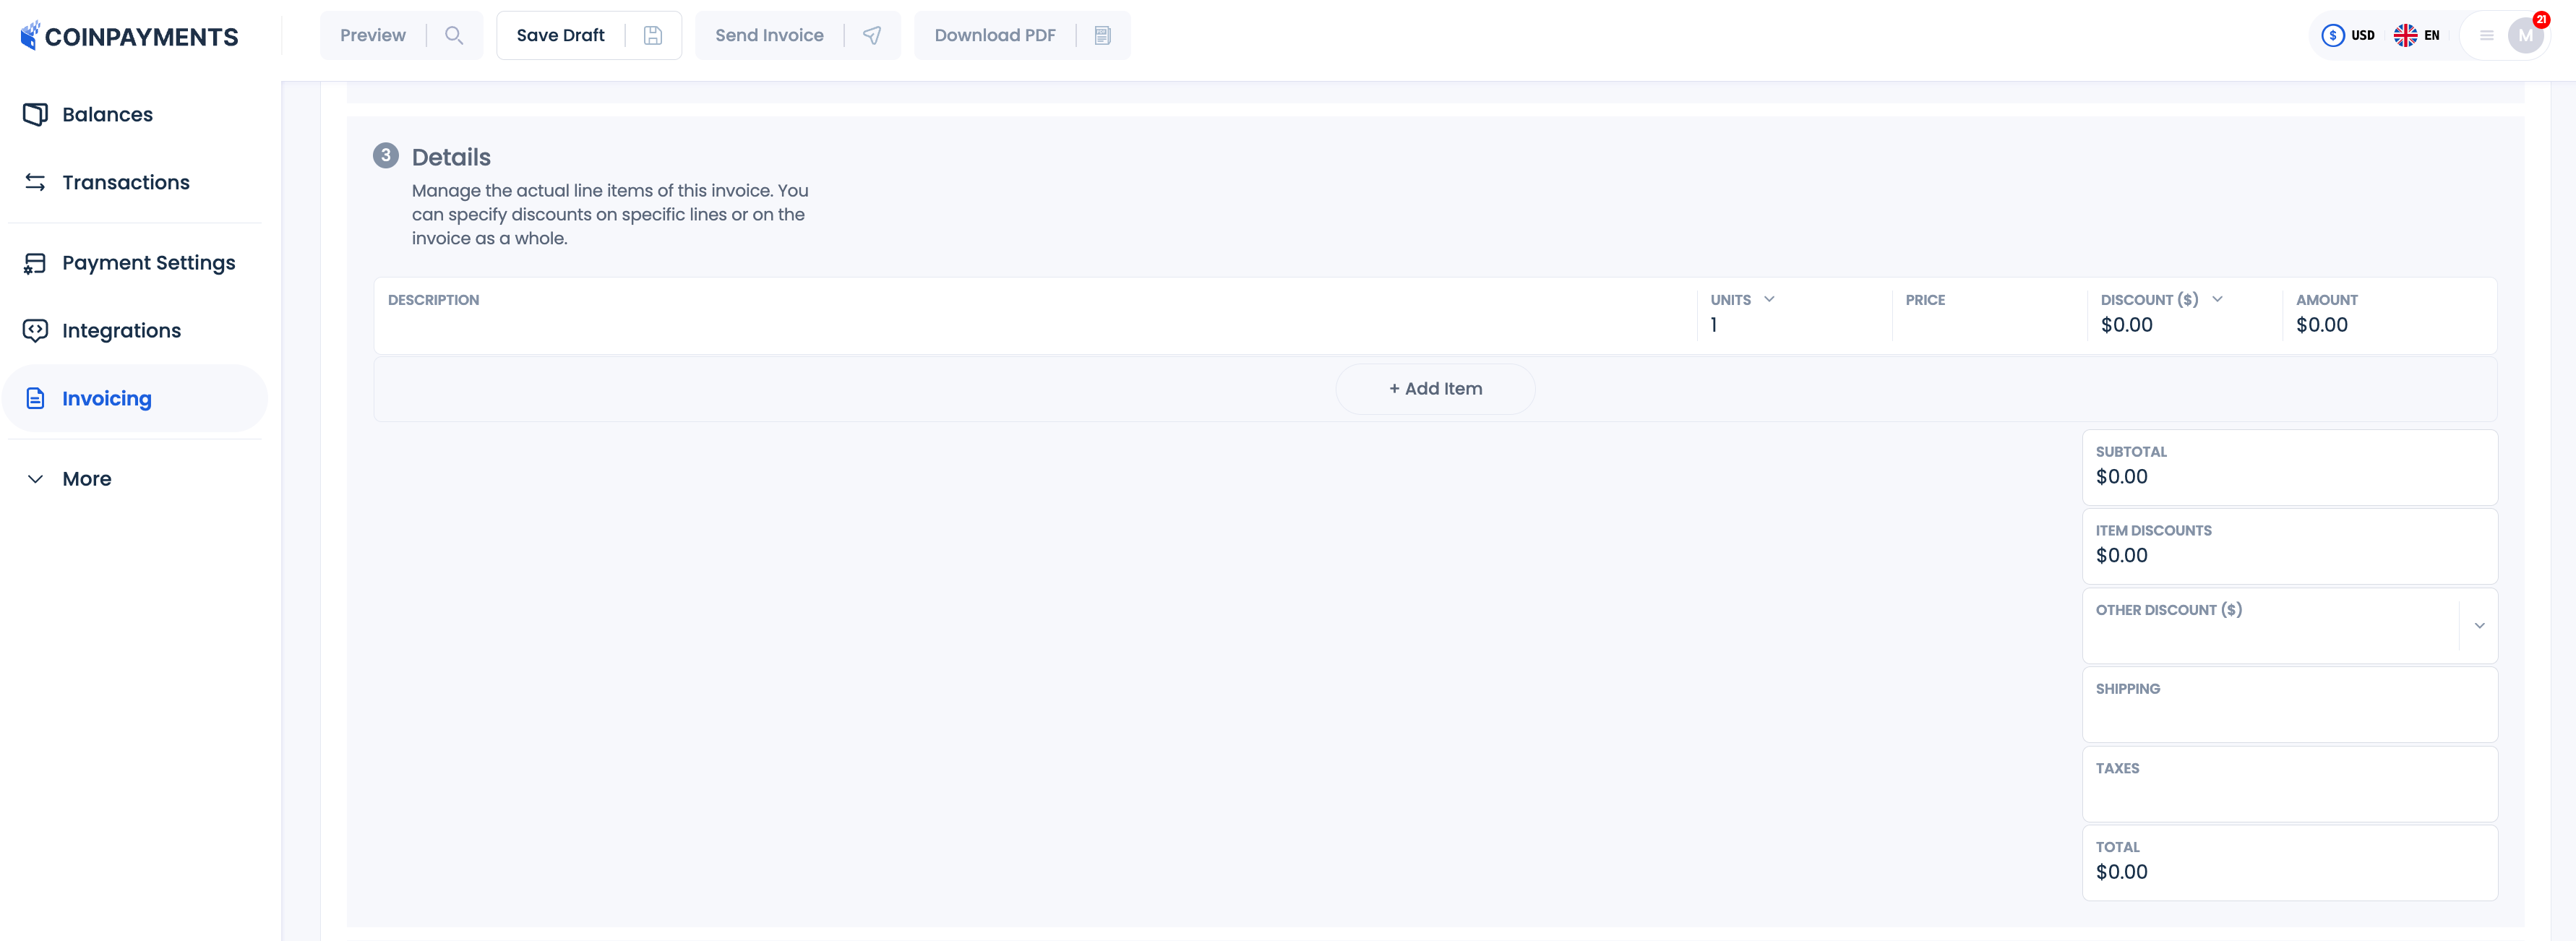
- Fill in Invoice Details:
- Specify what your client is purchasing, the total amount, and any other relevant details.
- Optionally, you can add a discount to provide a special deal for your client.
- Include Notes and Conditions:
- Provide any additional notes or terms, if necessary, to ensure clarity for your client.

- Preview and Send the Invoice:
- Before sending, preview the invoice to see exactly how it will appear to your client.
- You can choose to send the invoice instantly via email, save it as a draft for later or download as PDF.

Payment Buttons
The Payment Button integration is a quick and easy way to add cryptocurrency payment options to your website. This method is ideal for:
- Businesses with fixed-price offerings.
- Charities or organizations seeking to add a donation button.
- Scenarios where the price linked to the button is fixed (no cart functionality).
Unlike other integration methods, this tool requires minimal coding knowledge, making it a simple yet powerful solution for most businesses.
How to Get Started
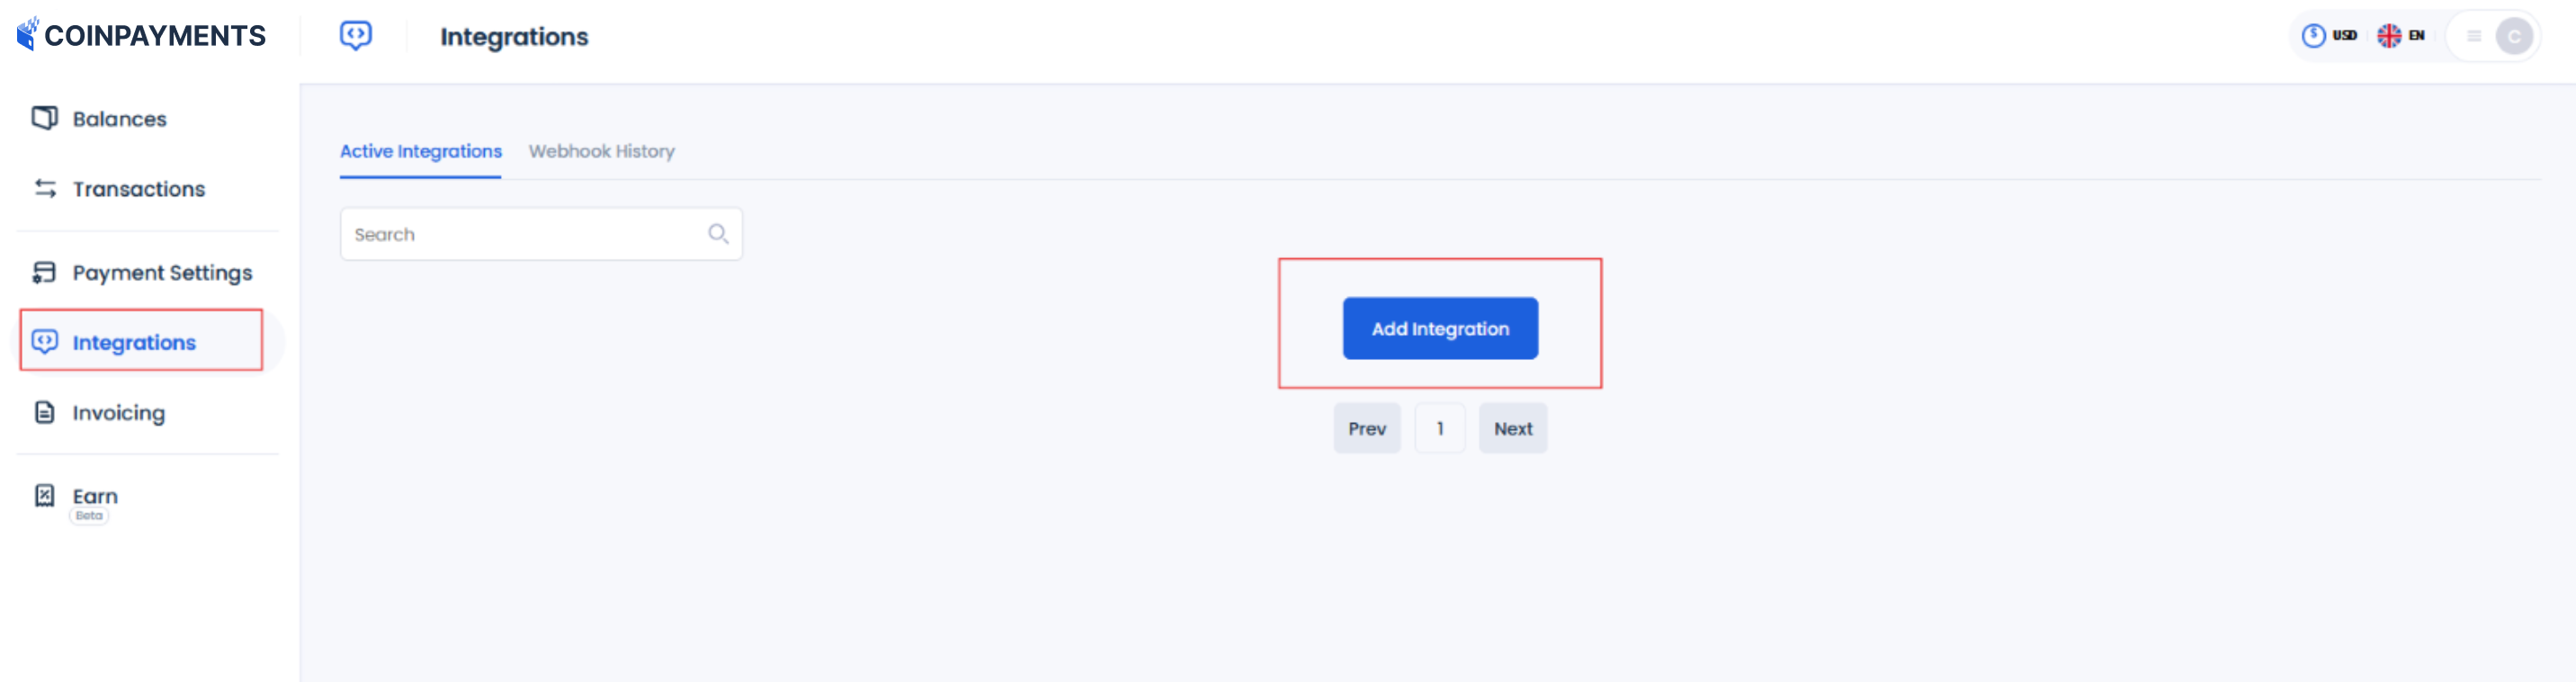
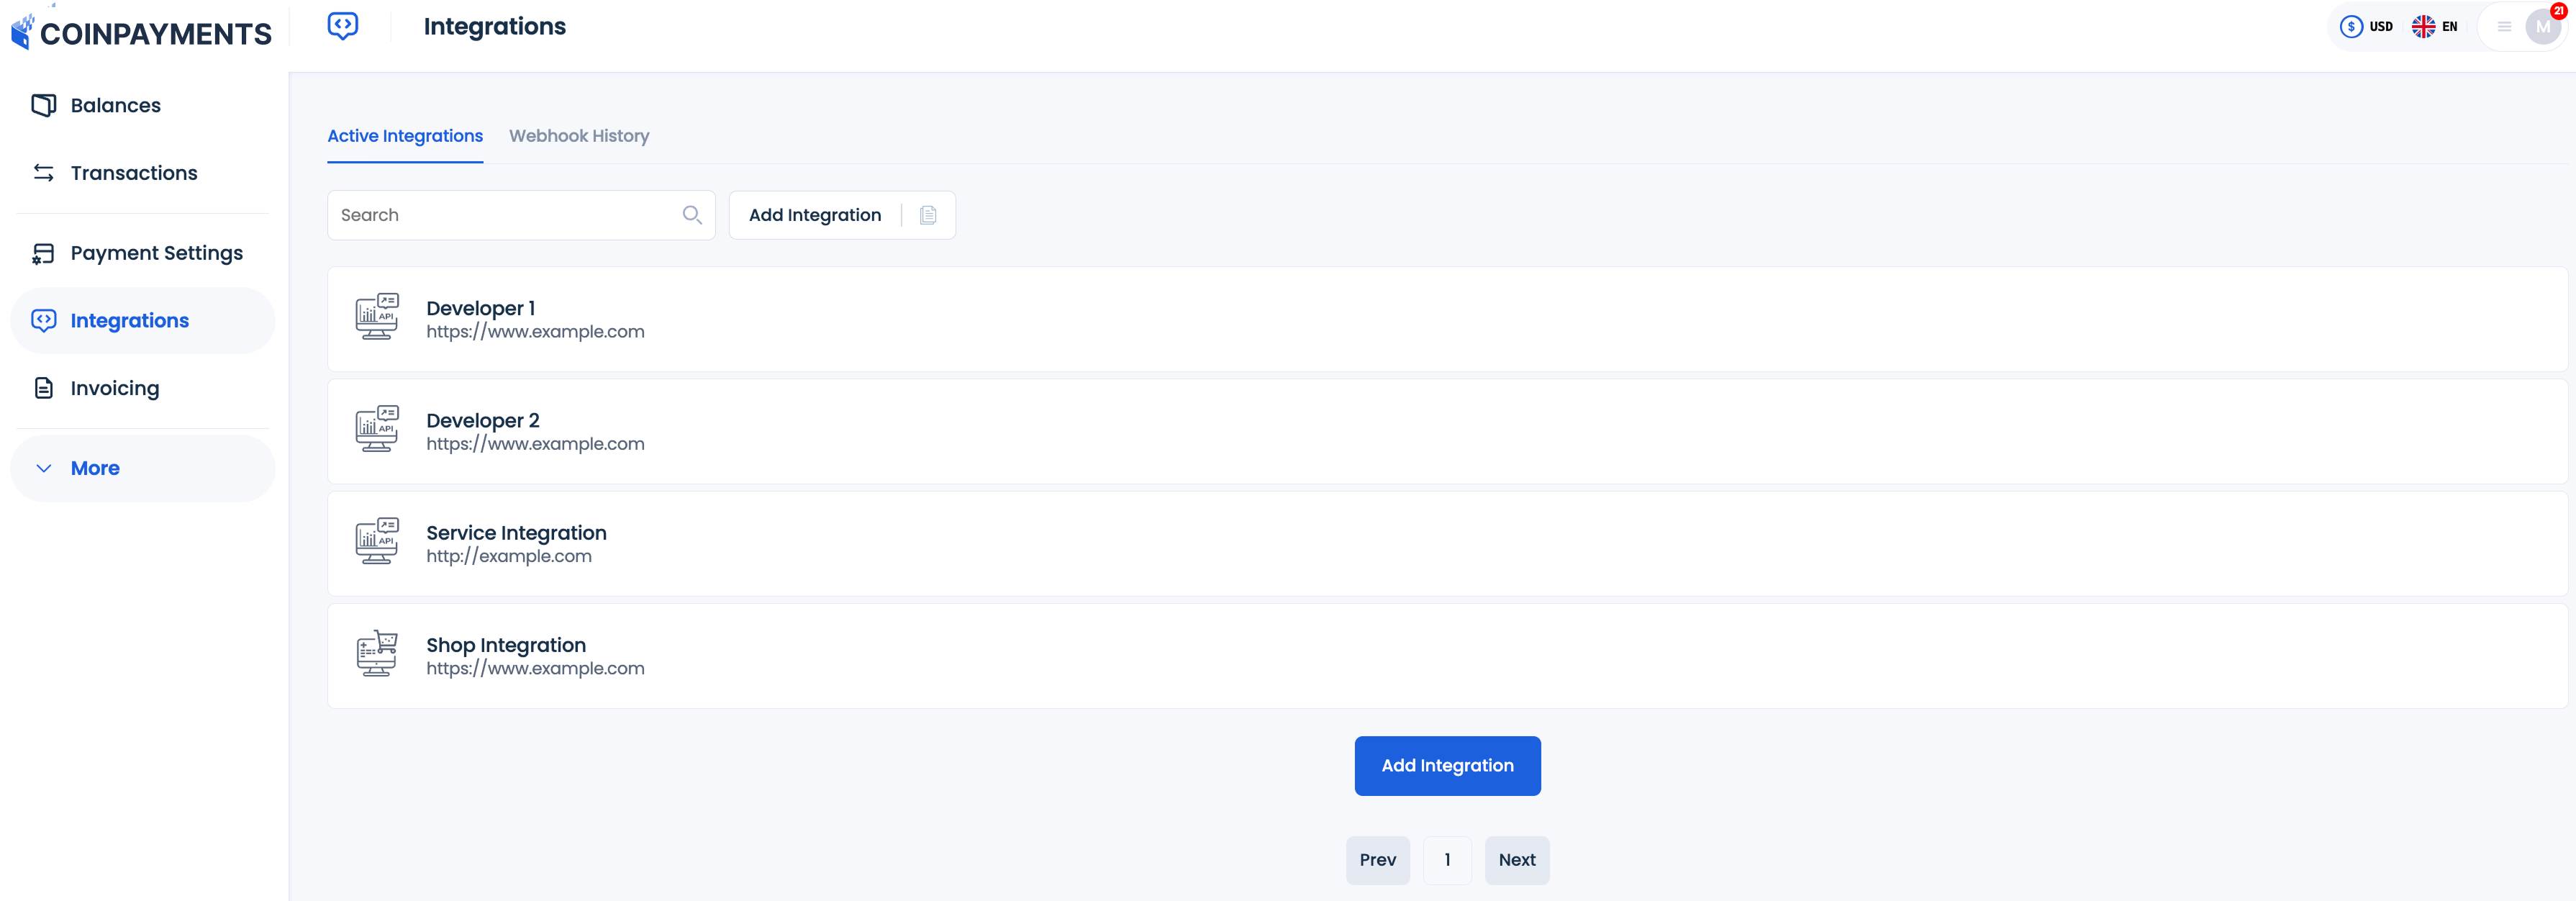
- Navigate to the Integrations Tab:
- Go to the Integrations tab in your CoinPayments dashboard and click on Add Integration.
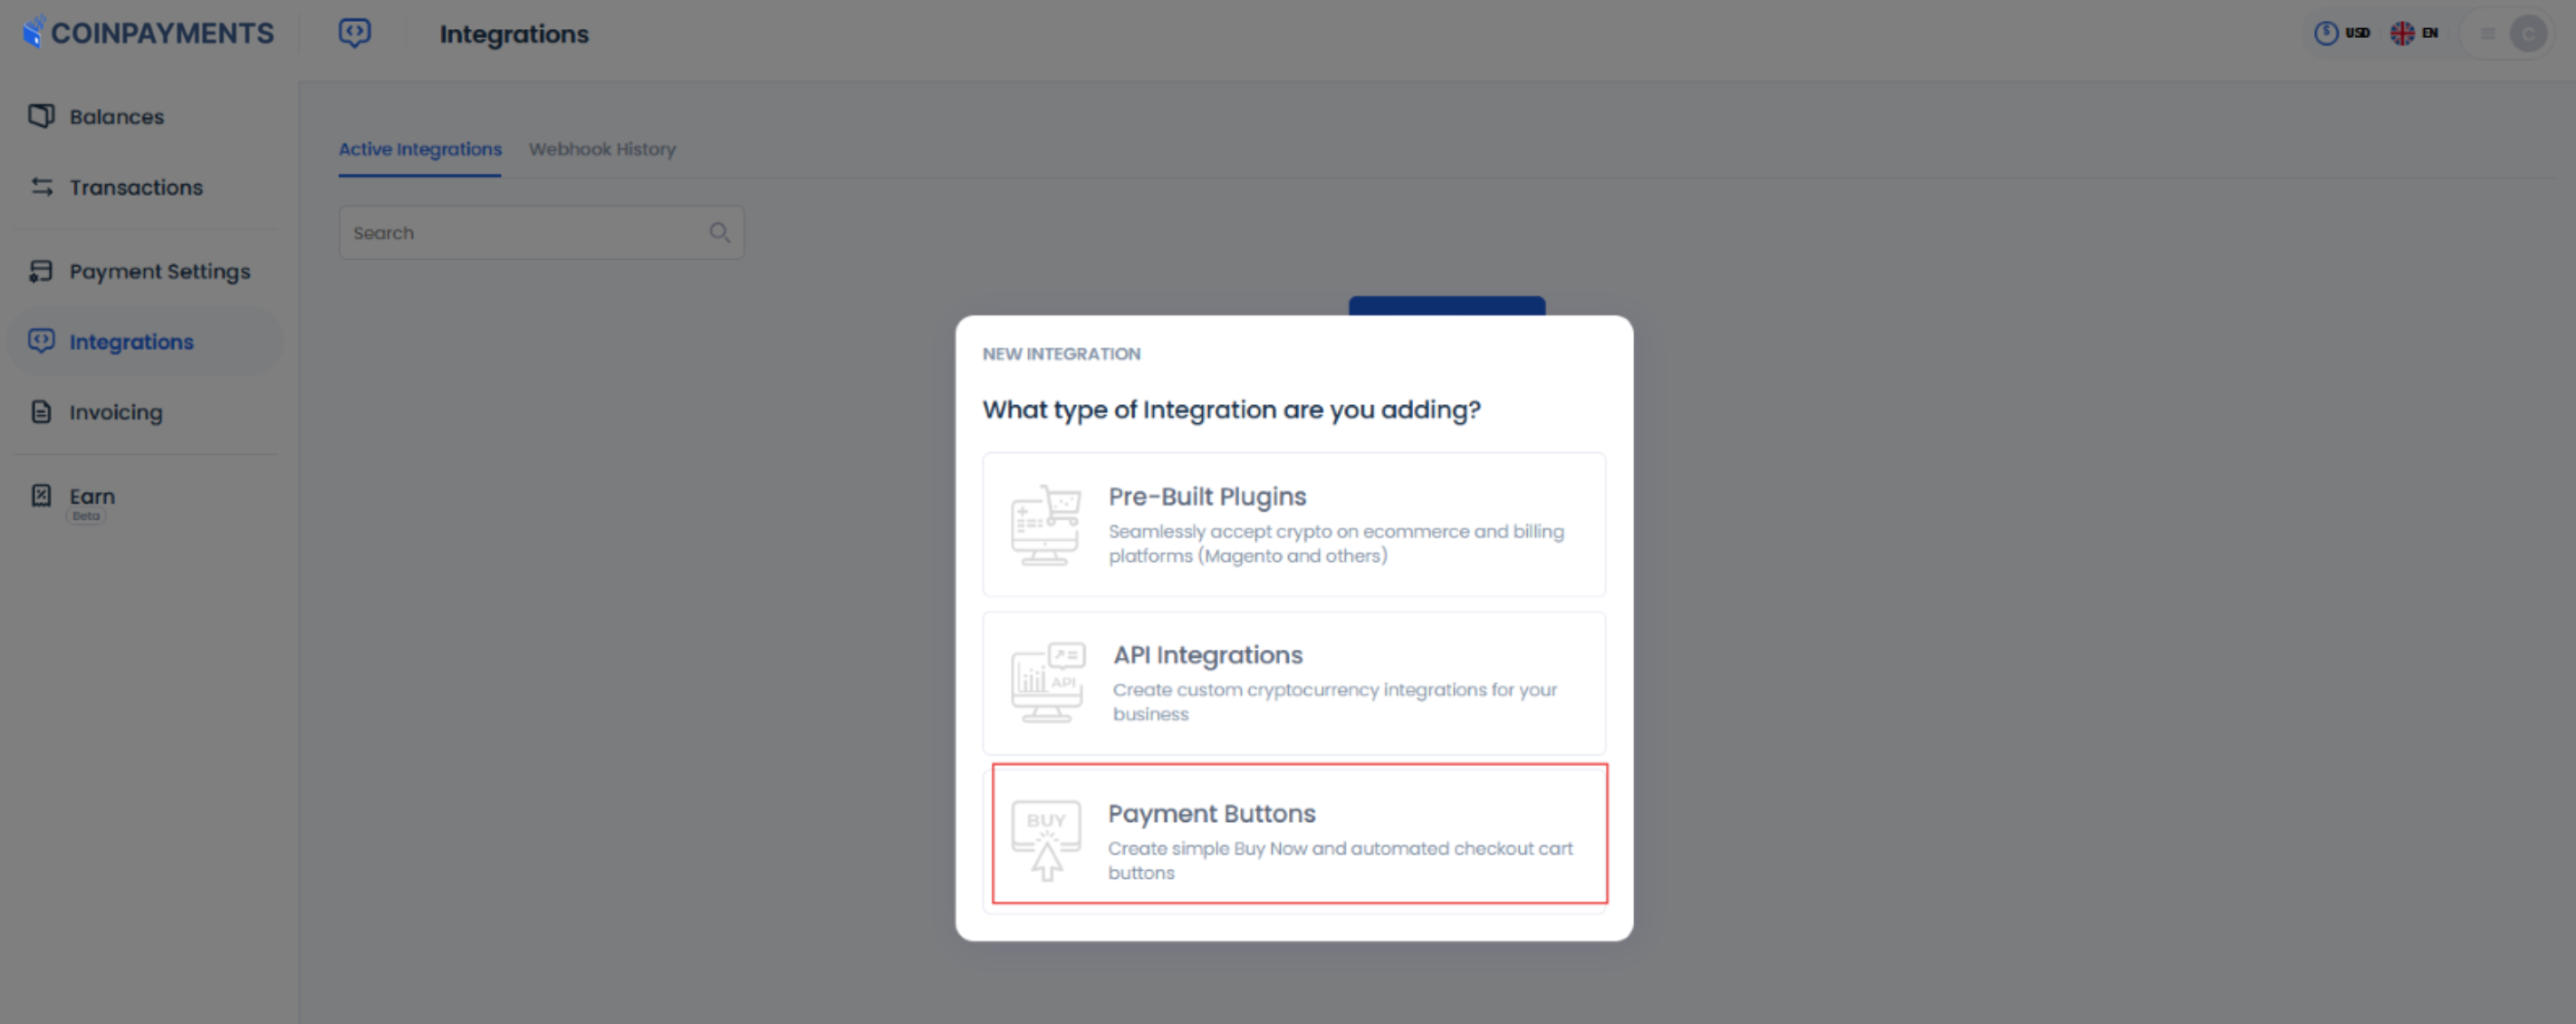
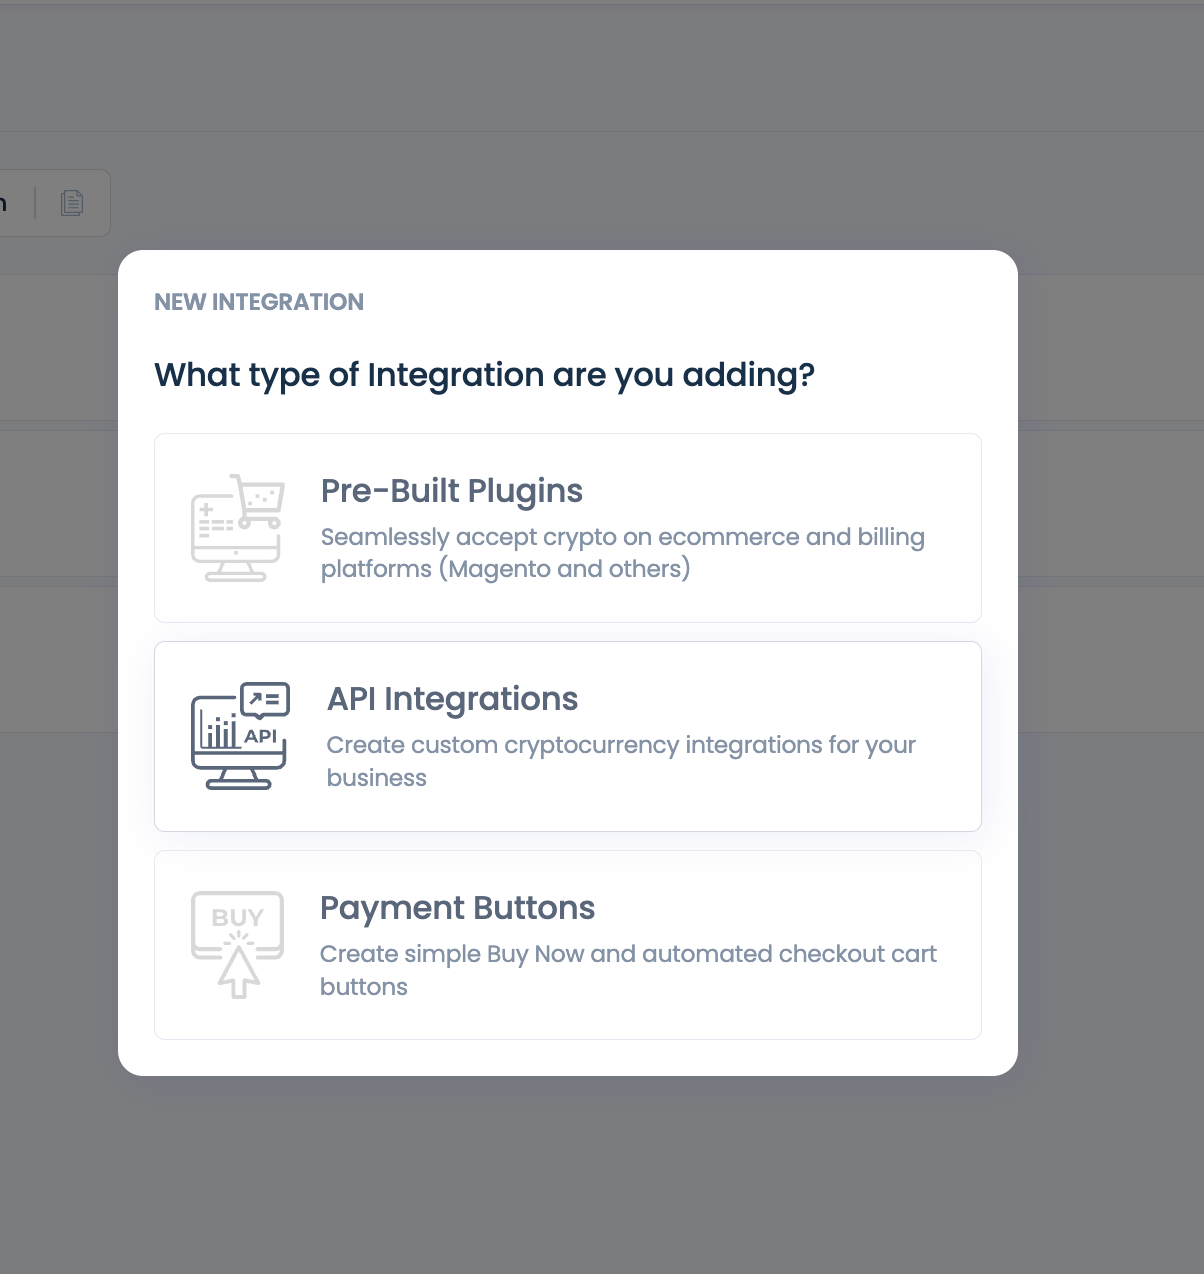
- Select Payment Buttons:
- When prompted to choose the type of integration, select Payment Buttons from the options available.
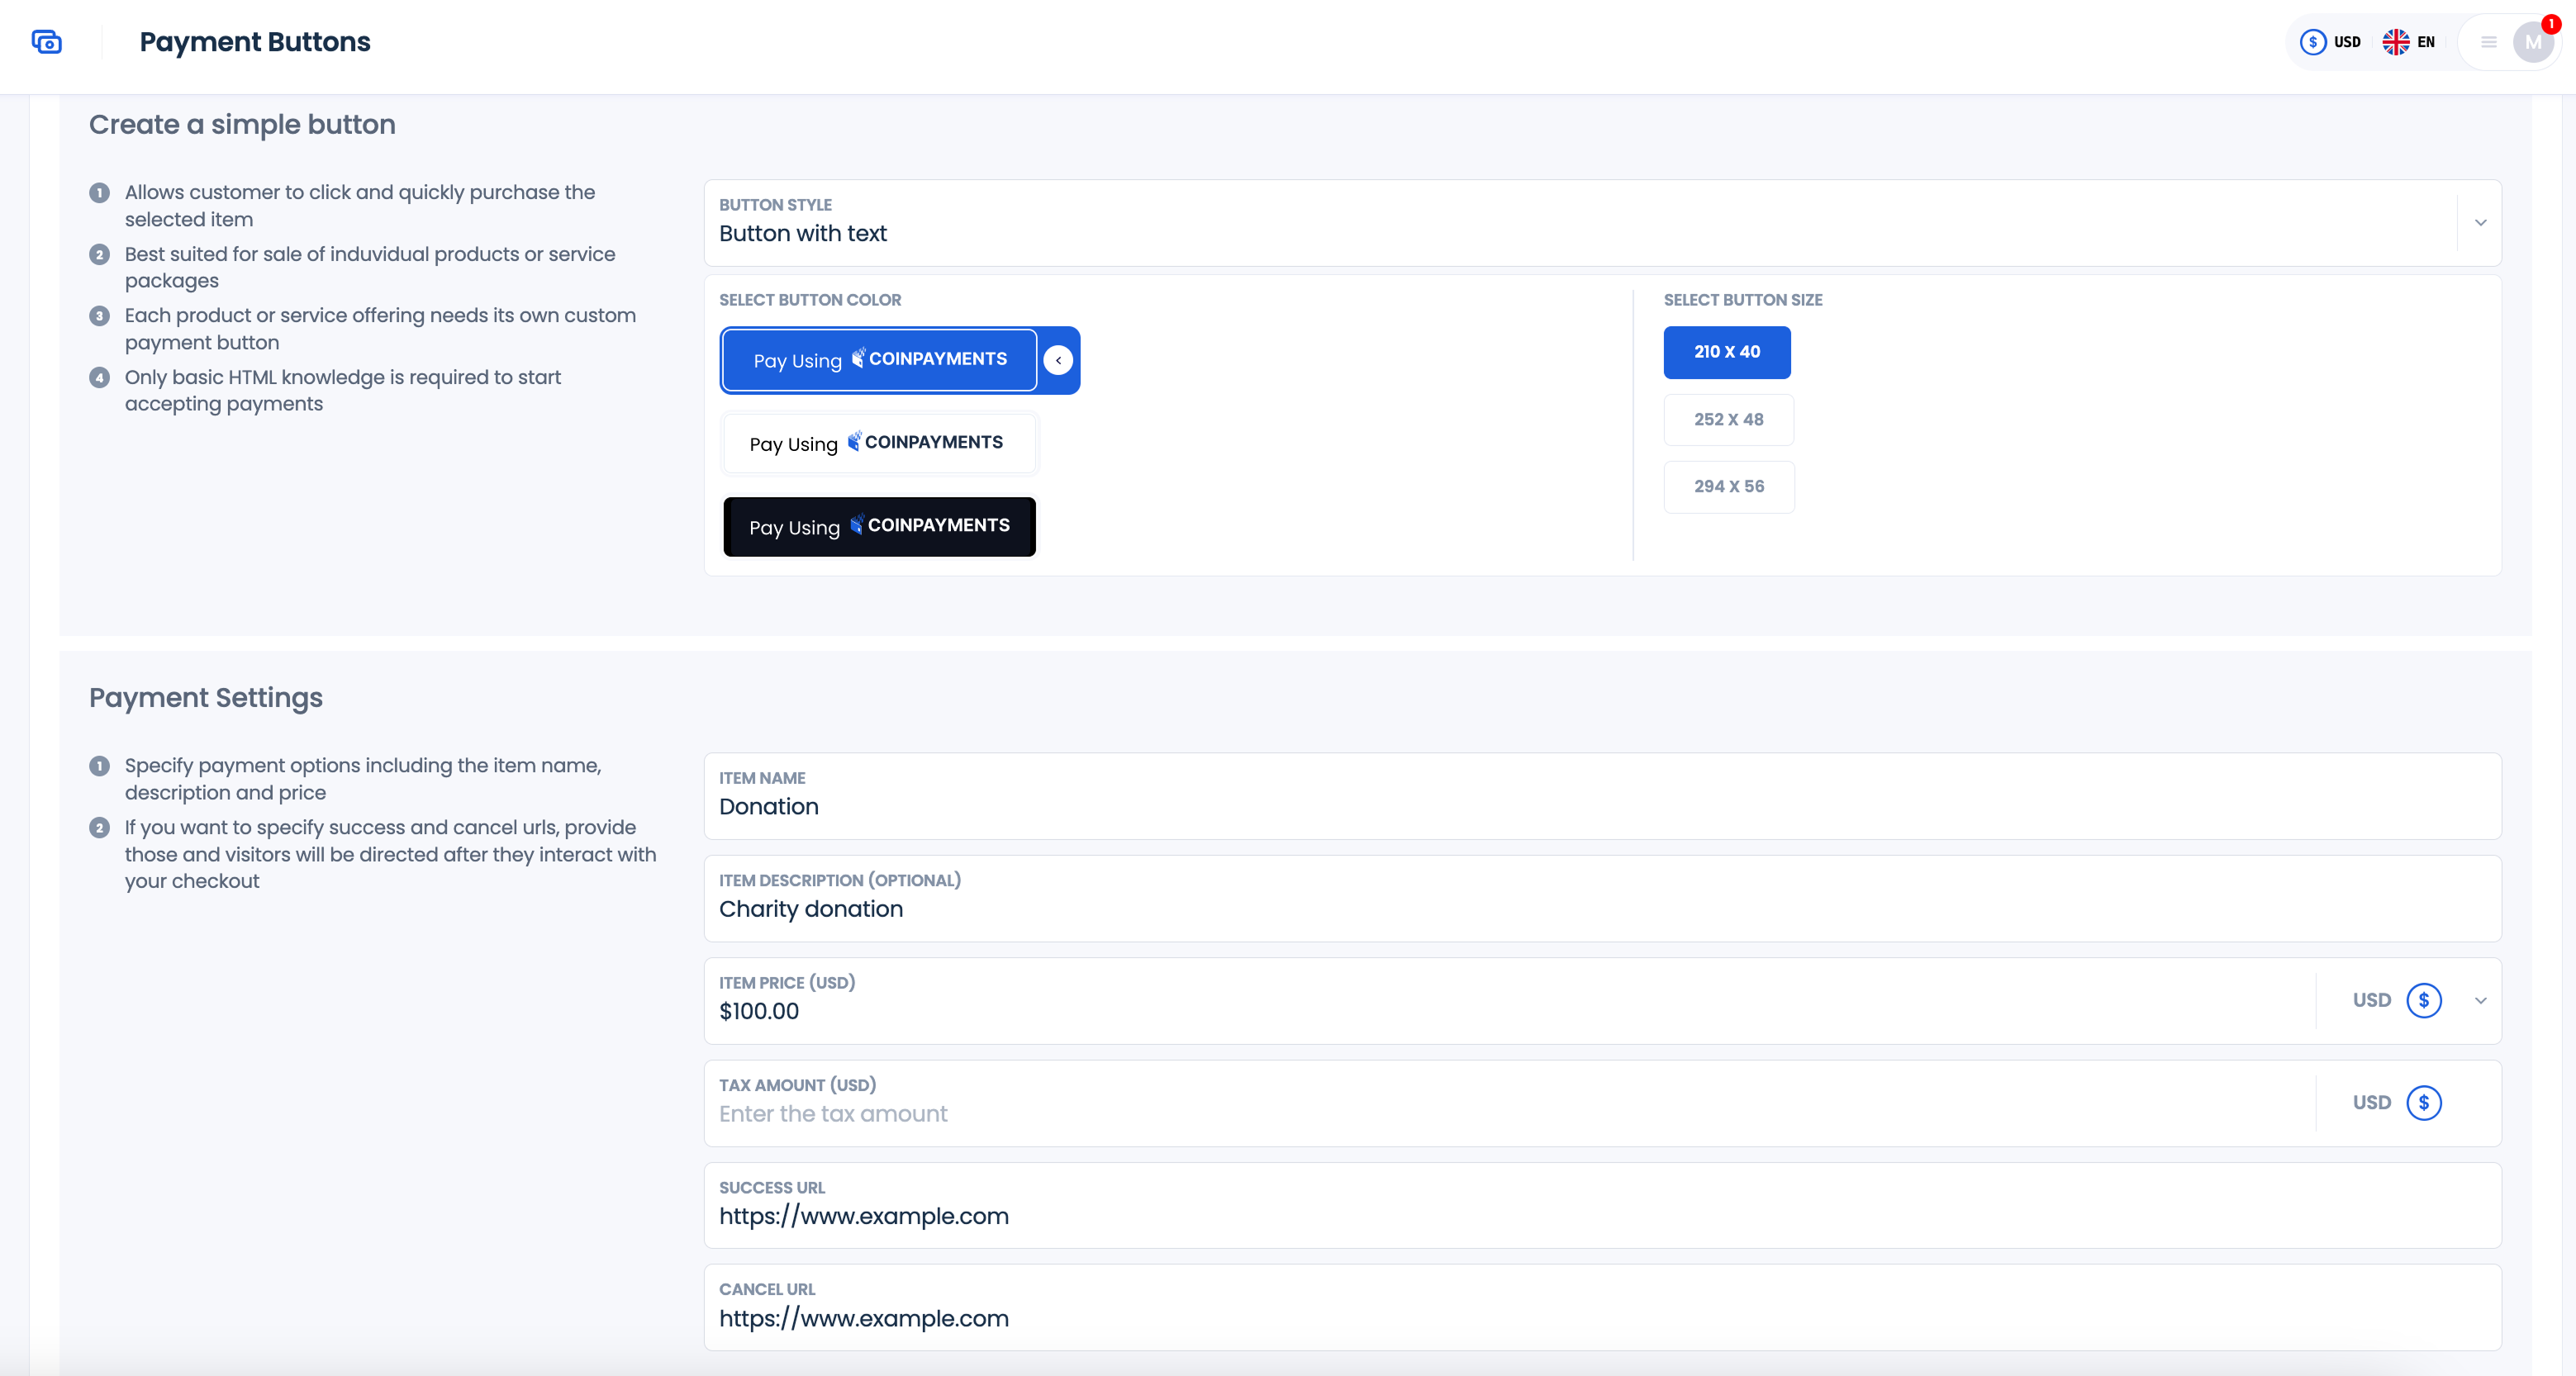
- Access the Payment Button Wizard:
- Navigate to the Payment Buttons section in your CoinPayments dashboard.
- Select the button’s style, color, and size to suit your preferences.
- Create Your Payment Button:
- Enter the relevant details, such as the product name, price, and currency.
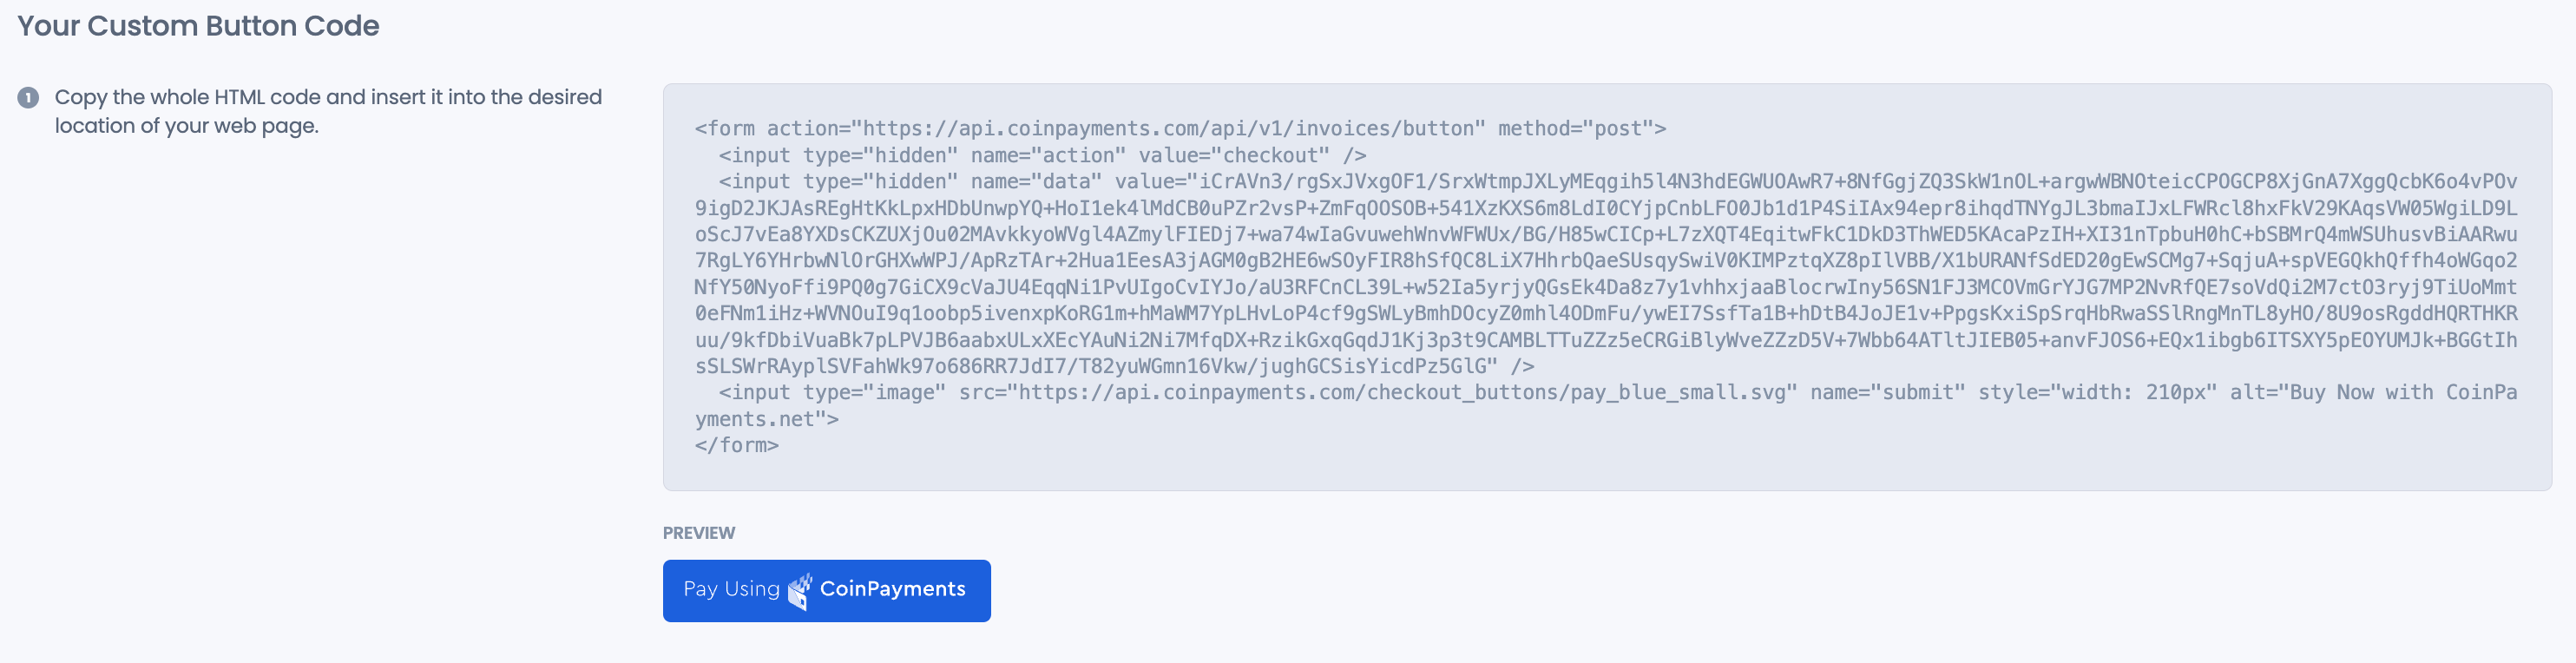
- Generate Button Code:
- Once all details are filled in, the system will automatically generate the code for your button.
- Place the Button on Your Website:
- Copy the generated code and paste it into the desired location on your website.
Pre-Built eCommerce Plugins
Pre-Built eCommerce Plugins are ideal for online stores using platforms like Magento or other popular eCommerce systems. These plugins save time by offering ready-to-use features, eliminating the need to code from scratch.
This integration provides access to a variety of tools, including:
- Payment buttons.
- Direct deposits and withdrawals.
- Wallet creation and management.
- Role-based access controls for enhanced security.
How to Get Started
- Navigate to the Integrations Tab:
- Go to the Integrations tab in your CoinPayments dashboard and click on Add Integration.

- Select Pre-Built Plugins when prompted to choose the type of integration
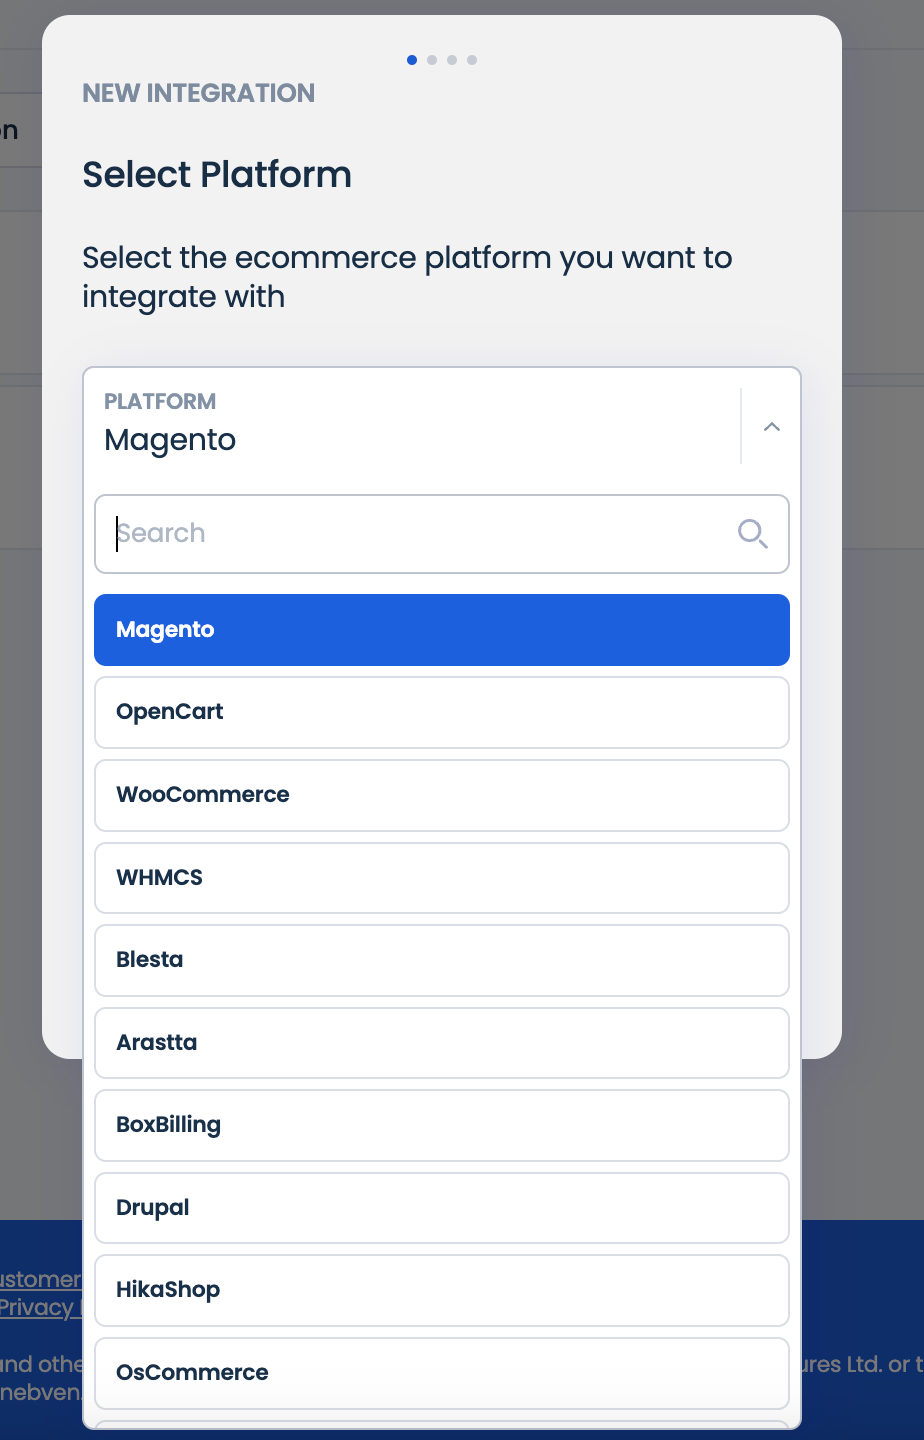
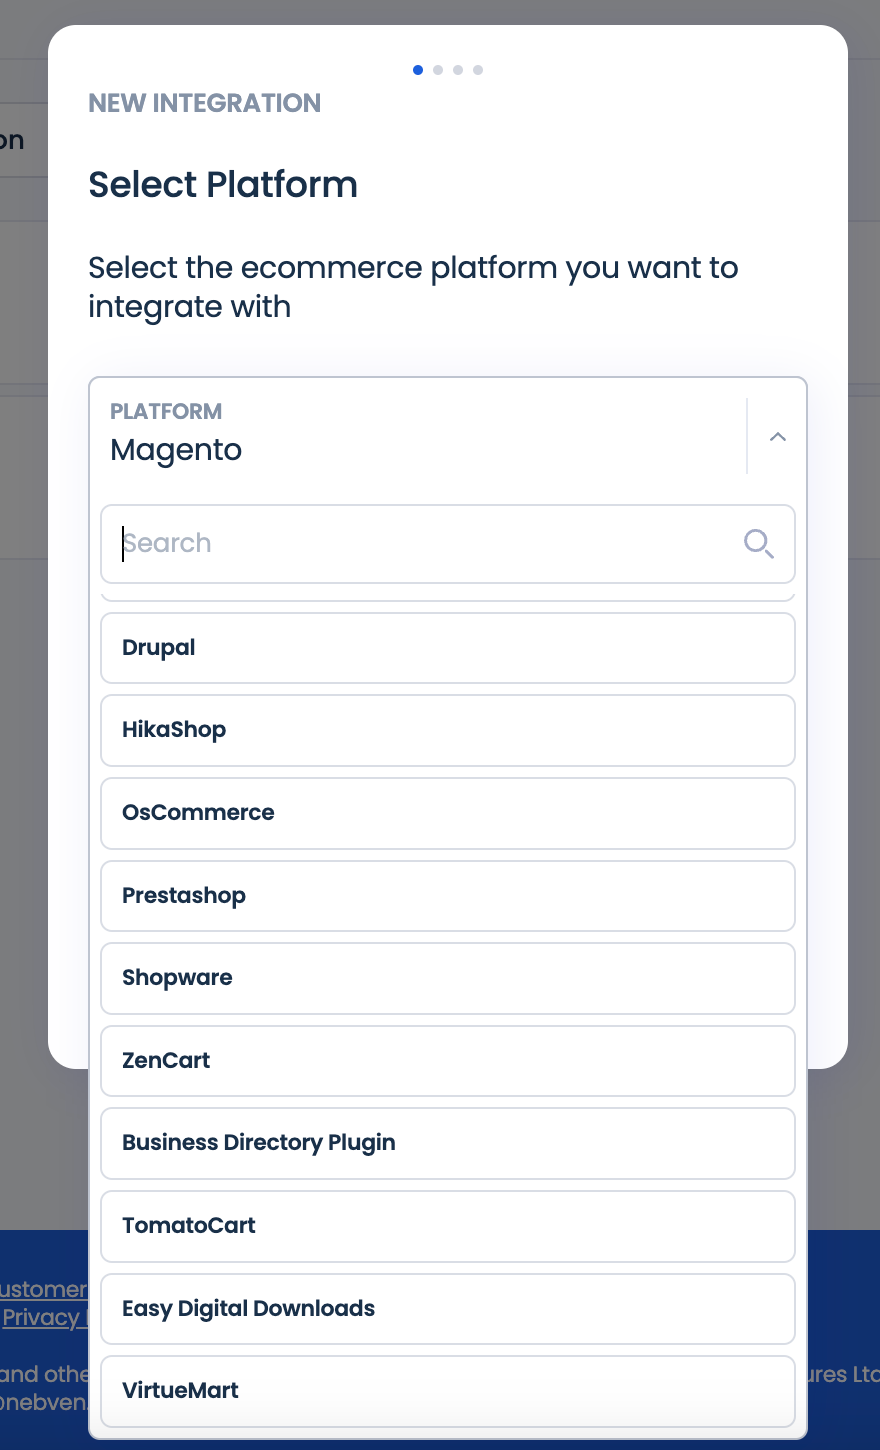
- Browse Available Plugins:
- Scroll through the list to find the plugin that corresponds to your eCommerce platform.
- Download the one that corresponds to your eCommerce platform and install the plugin.
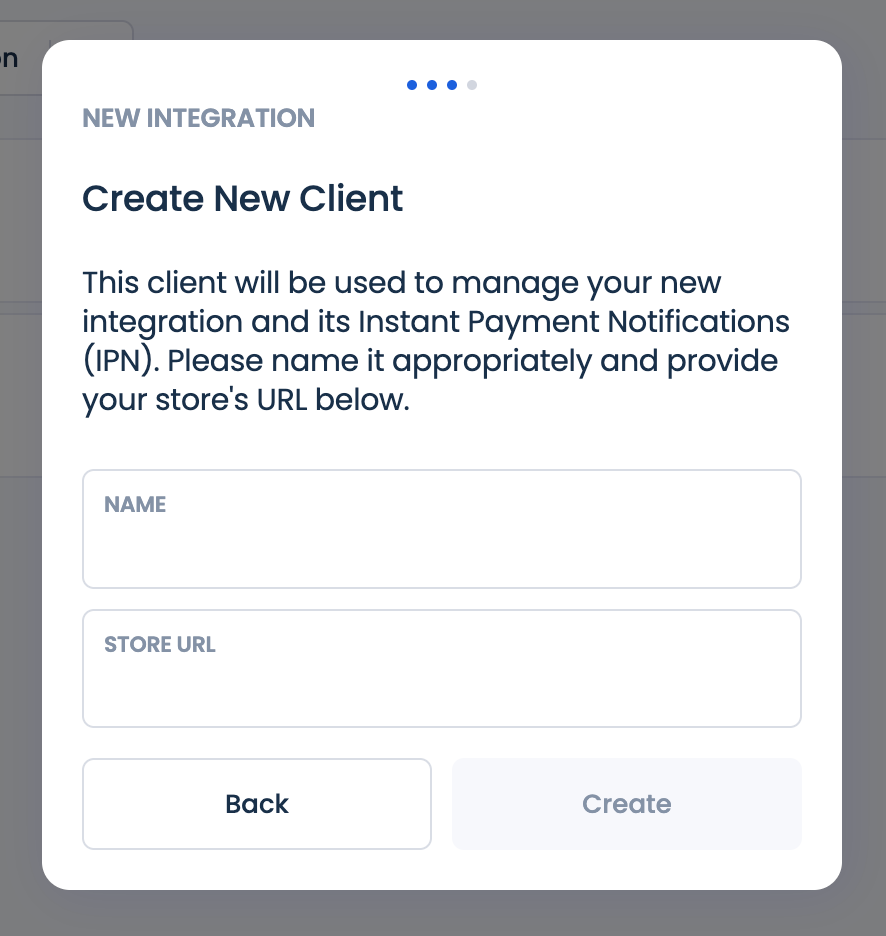
- Provide Your Website Link:
- Provide your store details and link to your store website to ensure seamless communication between your eCommerce platform and CoinPayments.
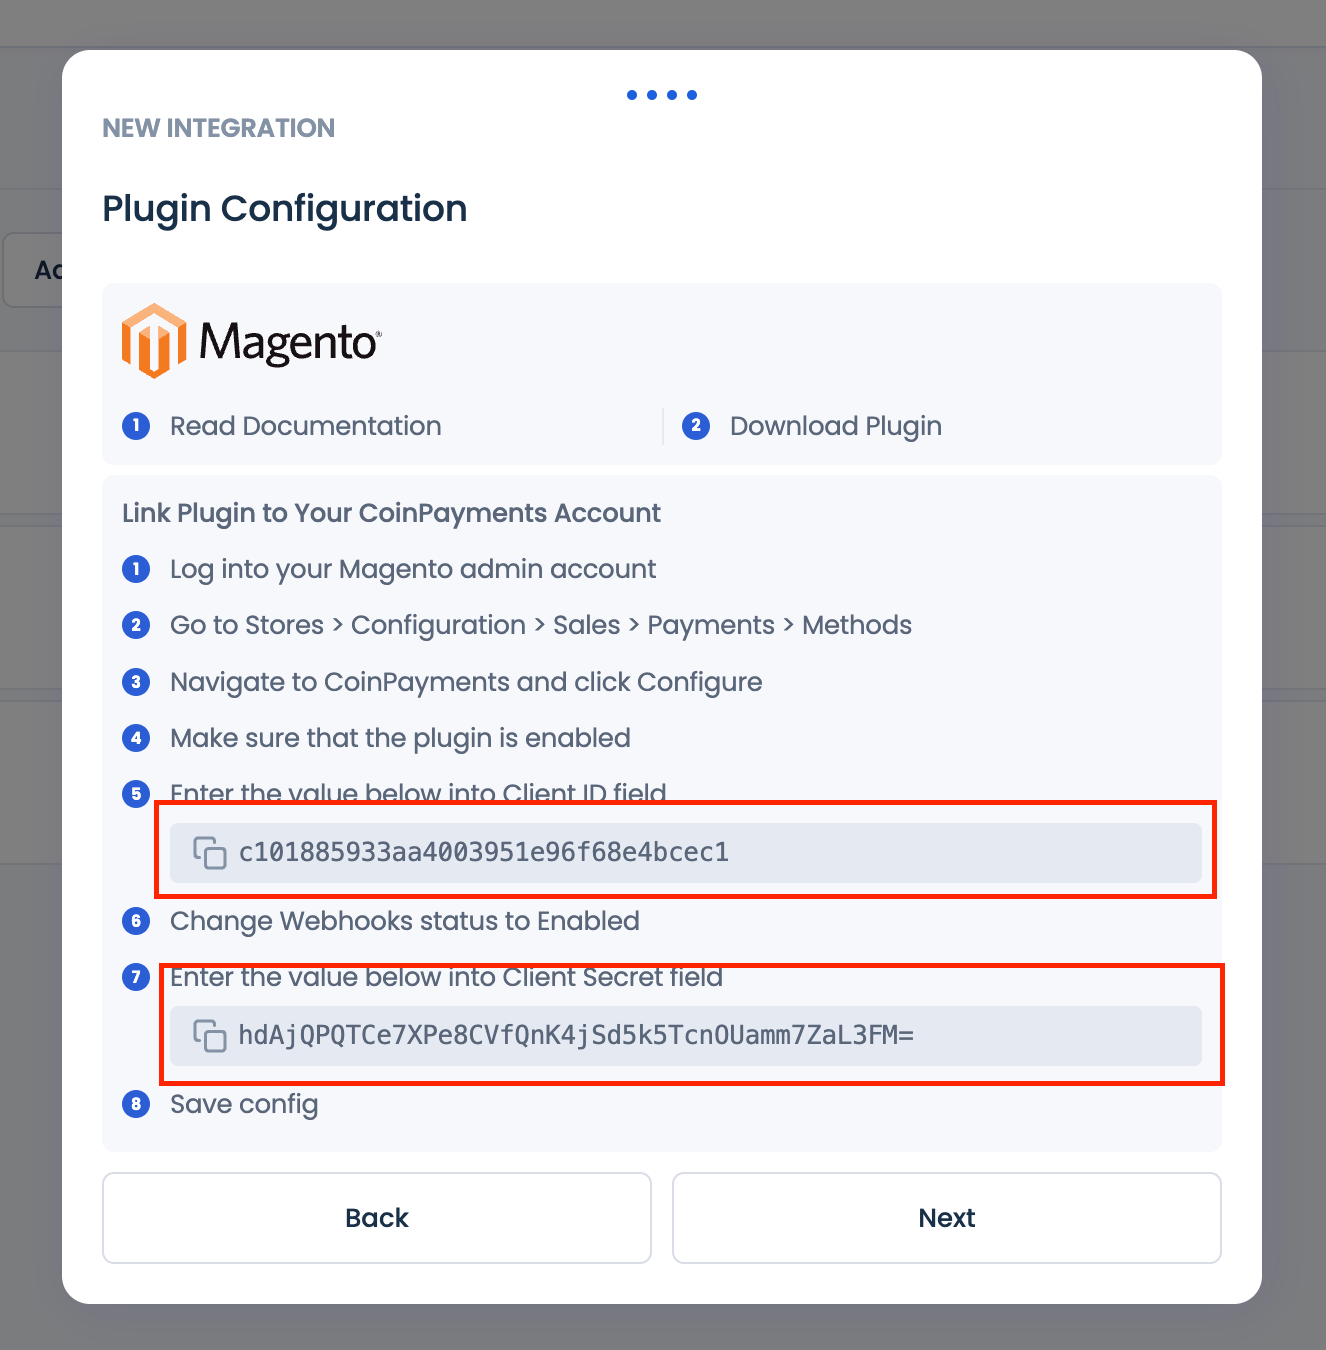
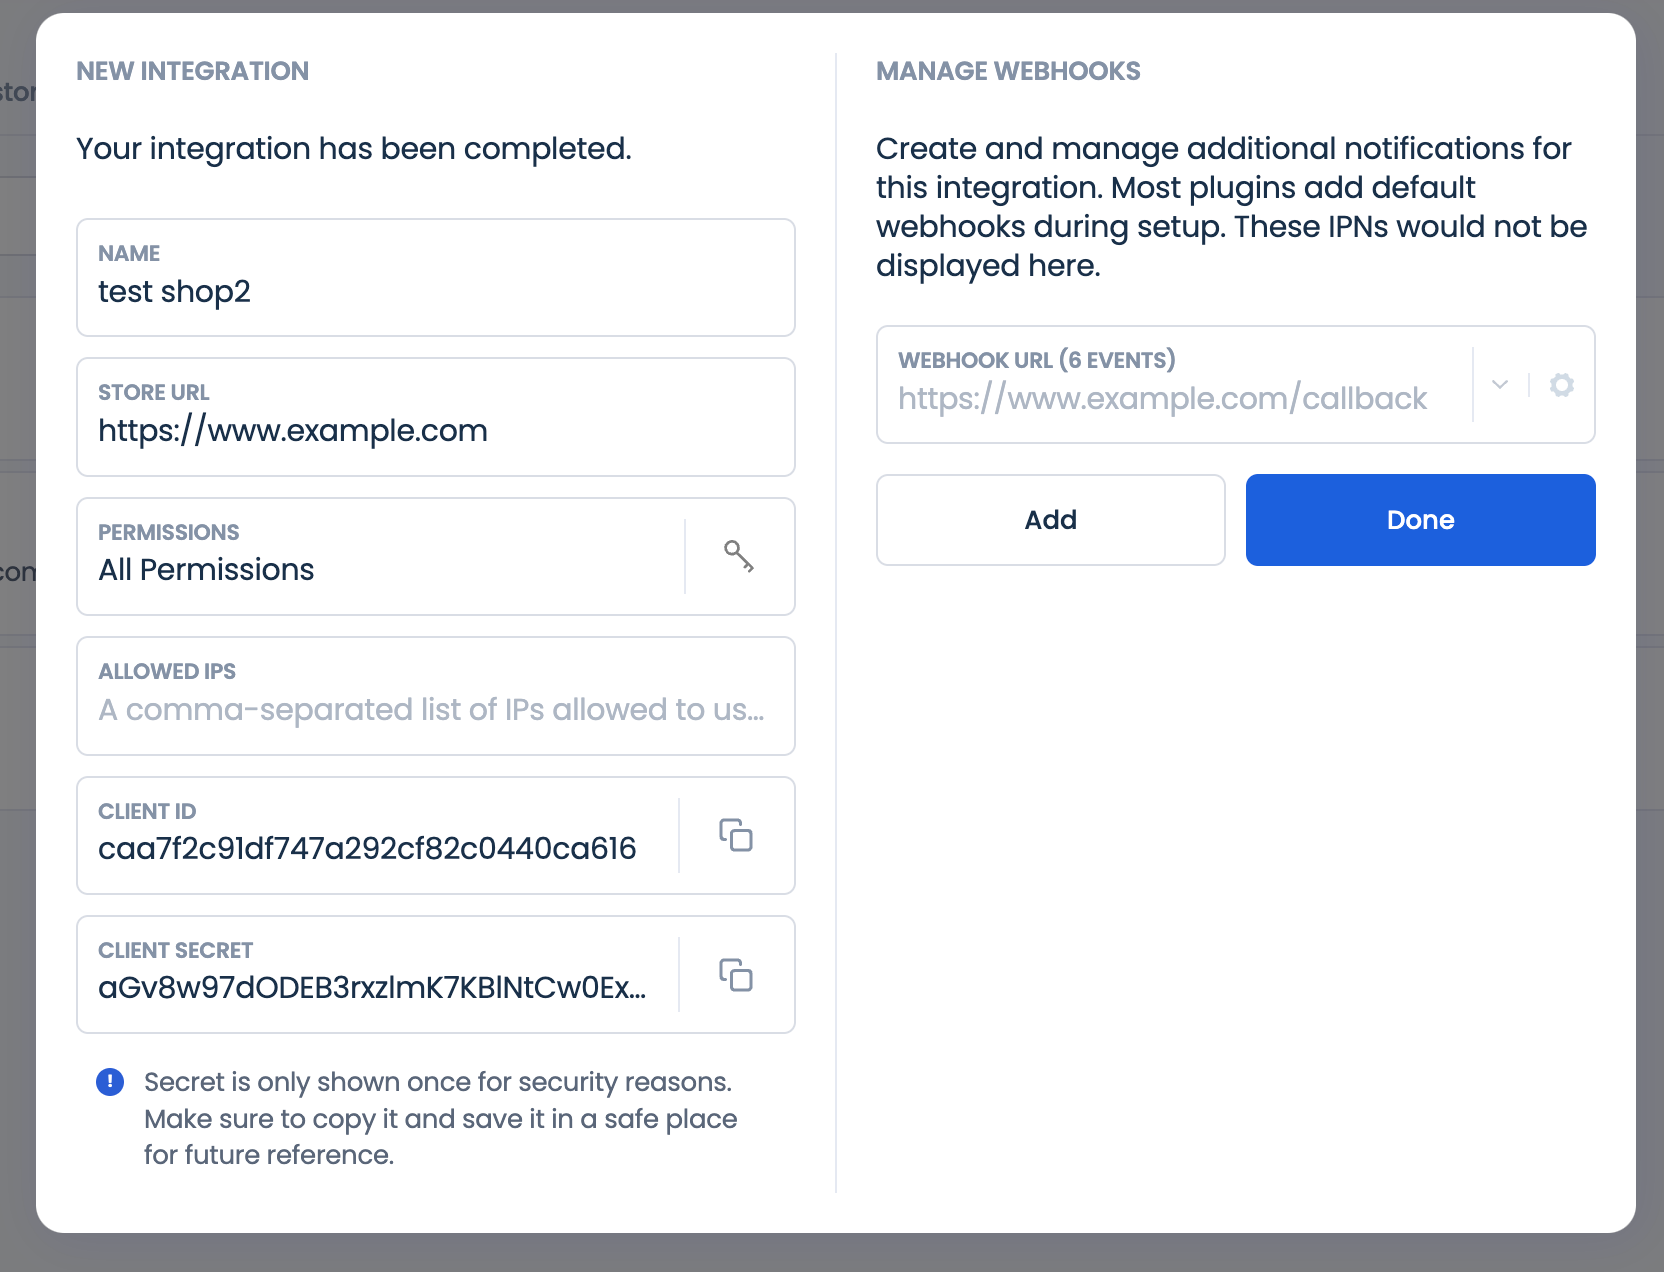
- Configure the Plugin:
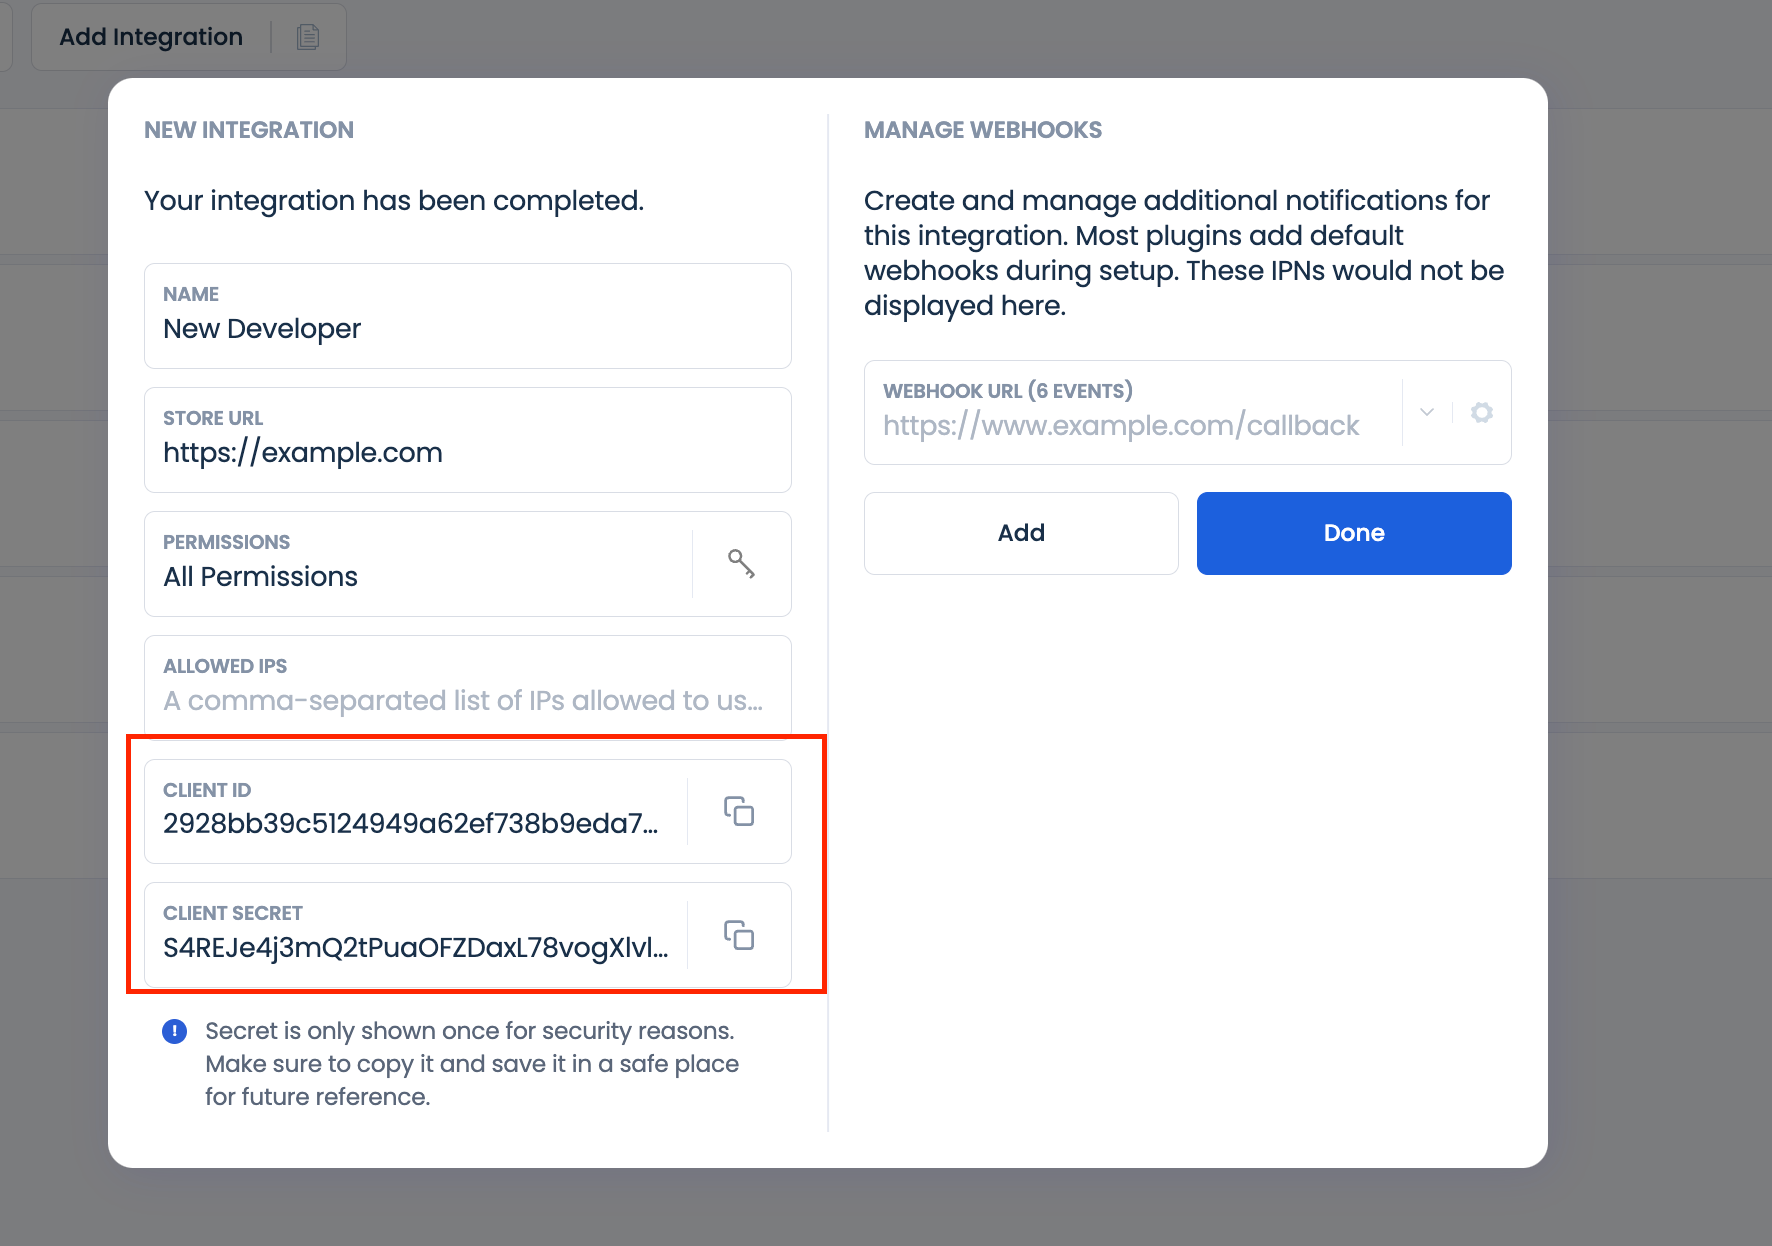
- Use your CLIENT ID and CLIENT SECRET in the Plugin Configuration wizard to connect your eCommerce platform with CoinPayments.
Note: Your Client Secret is shown only once for security purposes, so store it securely.
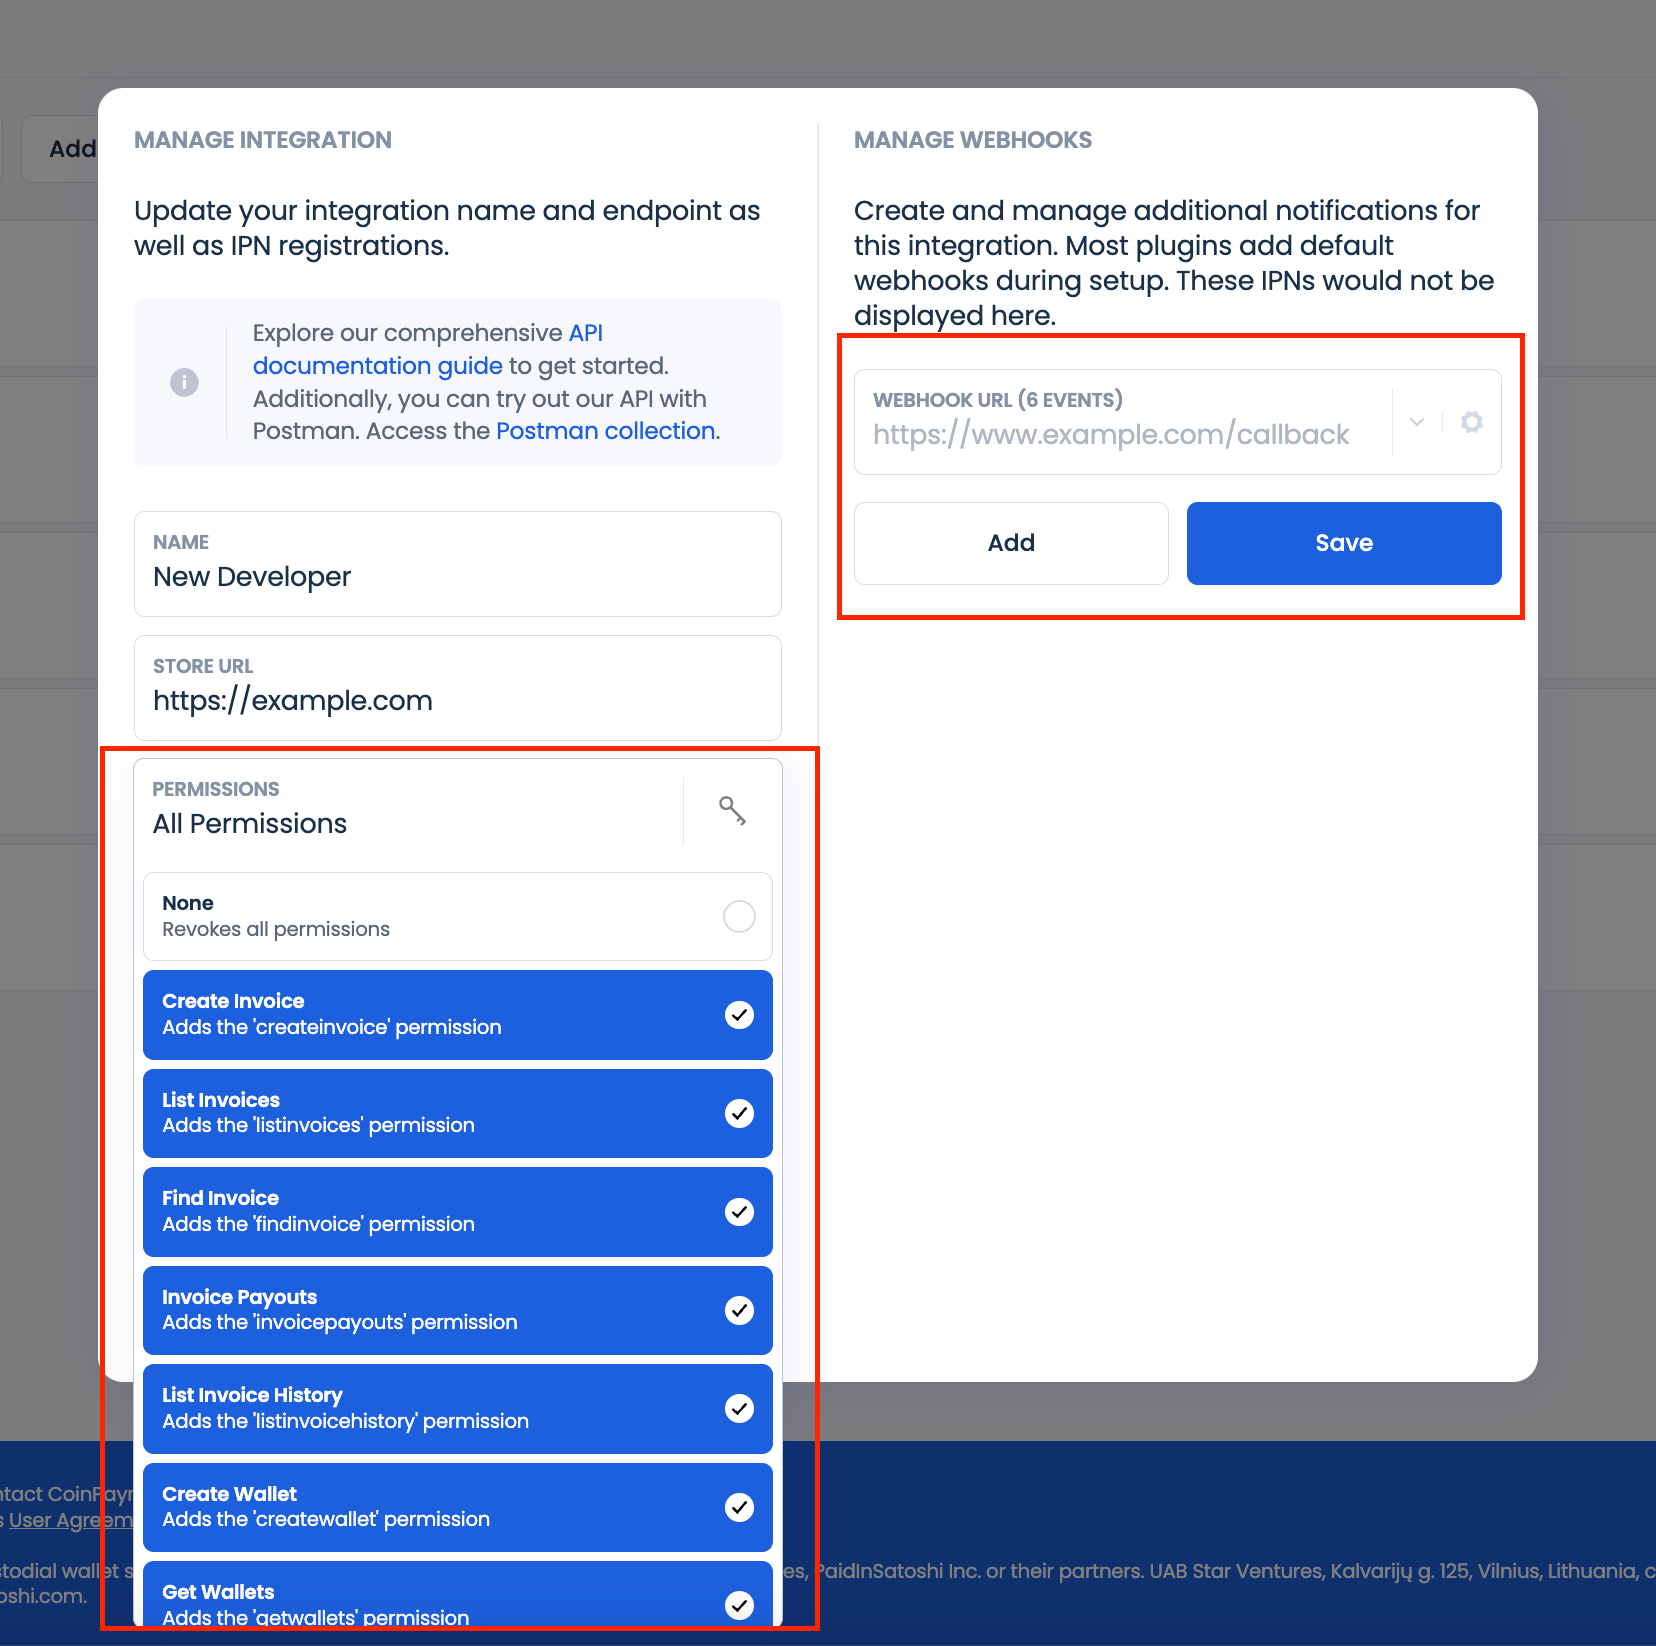
- Set Permissions and IP Whitelisting:
- Configure user permissions, allowed IPs, and webhook types to align with your business requirements.
Custom APIs
This integration type demands more advanced developer skills compared to other CoinPayments tools and is often utilized for custom solutions. Common applications include online casinos, businesses offering subscription-based services, and online shops aiming to white-label the checkout process. It is also suitable for other specialized use cases.
The API is designed to provide merchants with a straightforward and secure way to accept cryptocurrency payments. For comprehensive guidance and resources on integrating CoinPayments into your applications, refer to our detailed API documentation.
How to Get Started
- Navigate to the Integrations Tab:
- Go to the Integrations tab in your CoinPayments dashboard and click on Add Integration.
- Select API Integration:
- Choose API Integrations when prompted to select an integration type.
- Provide Your Website Link:
- Enter the website URL to ensure smooth communication between your system and CoinPayments.
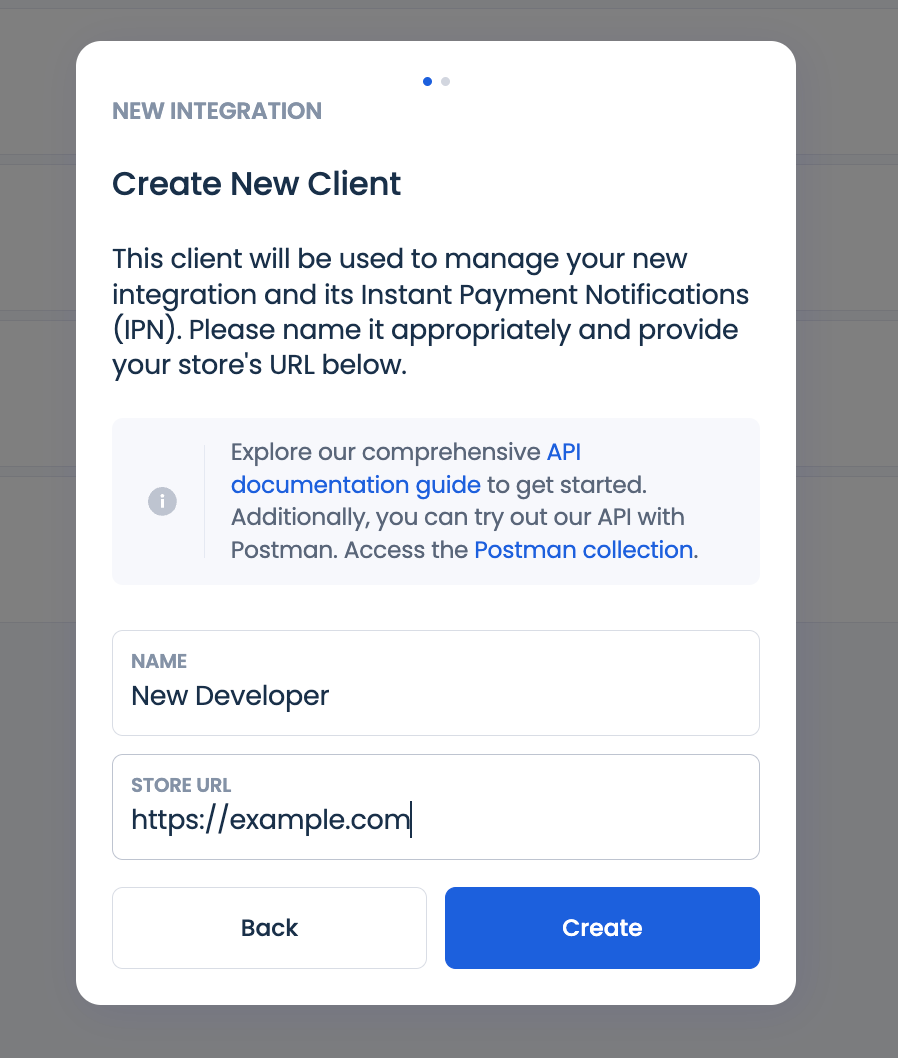
- Use CLIENT ID and CLIENT SECRET:
- Next, use your CLIENT ID and your CLIENT SECRET in the API Configuration wizard to complete the integration with the platform.
- Next, use your CLIENT ID and your CLIENT SECRET in the API Configuration wizard to complete the integration with the platform.
Note: The Client Secret is displayed only once for security purposes. Ensure you save it in a secure location.
- Configure Permissions and Webhook Types:
- Set user permissions and define the types of webhook notifications needed for your operations.